

How to connect a wireless network on Windows 11
Having issuer with the steps to connect your Windows 11 to Wireless Network at Home or Work Place, Don’t be trouble this guide, will elaborate the procedure to connect your Desktop Pc, Laptop computer and Smart device to a wireless network to connect local network and access the internet.
If you want to learn the Steps by Steps to procedure to connect you Windows 11 to a Wi-Fi network read the post to be abreast connecting Wireless device to a Win 11 operating system (OS).
Note
i. To connect Windows 11 to any WI-FI Network first know the Wi-fi Name and Password to connect to authenticate access .
ii. Windows 11 has ways to connect Wi-Fi network without cables, you can use the Window Taskbar, Settings, Control Panel.
iii. After input the Wi-Fi Password to access you can connect to the network any time, if internet is enable on the Wi-fi connection .
Let explore into the Steps through how to connect your computer to a Wi-Fi network on Windows 11, the post will walk you through How To Connect Wi-Fi Network From Taskbar , How To Connect Wi-Fi Network From Settings and How To Connect Wi-Fi Network From Control Panel
How To Connect Wi-Fi Network From Taskbar
Here are steps to connect Wireless Network using Taskbar:
1. On Taskbar, Click the Network icon in the bottom-right corner to launch Quick Settings.
2. Click the arrow button next to the wireless icon.
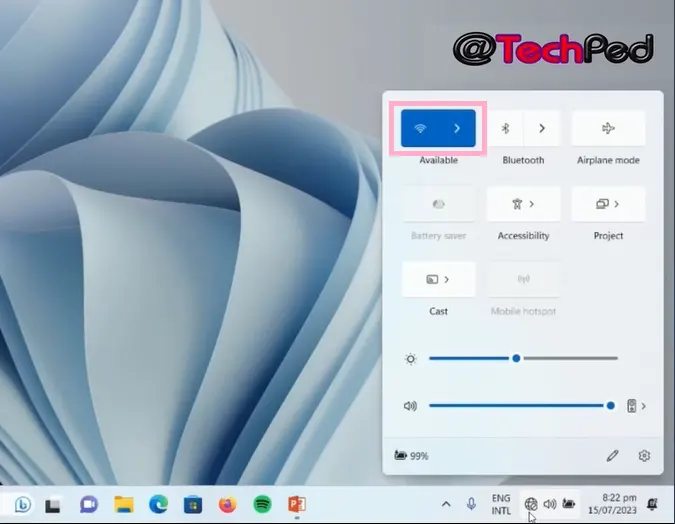
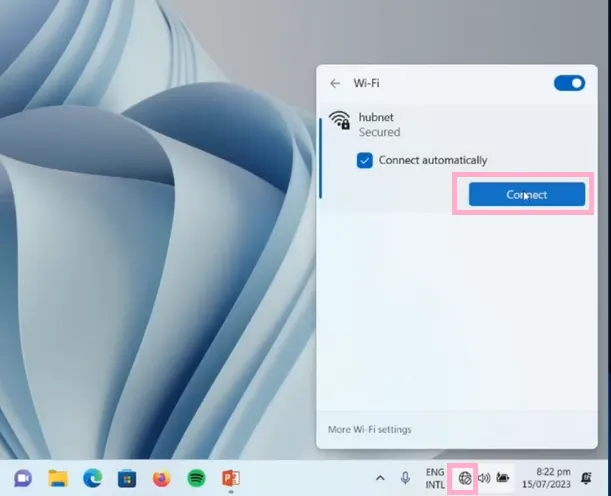
3. Select the wireless connection. or tick the Connect automatically option. (Optional)
4. Click the Connect button.
5. Input Password to Confirm the network connection
6. Click the Next button.
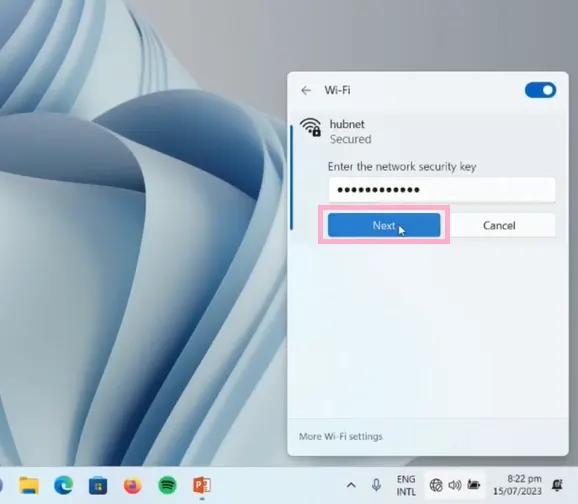
7. Confirm the passcode input the Wireless
8. Once you complete the steps, the computer will connect to wireless connection.
Alternatively
In Windows 11 (OS) you can also connect Wi-Fi Network Automatically after input Wi-Fi Password to authenticate connect after disconnect from the device.
To set the Wi-Fi adapter to connect automatically on Windows 11, use these steps below :
1. Click the Network icon on the taskbar.
2. Click the arrow button next to the wireless icon
3. Select the available wireless connection.
4. Check the Connect automatically and Click on Connect button.
How to Automatically Connection Wi-Fi on (Schedule )
In addition, Windows 11 (OS) also give an option to automatically reconnect the device manually after disconnecting connection.
To set the Wi-Fi adapter to reconnect automatically on Schedule in Windows 11, use these steps:
1. Click the wireless icon on the taskbar.
2. Click the button next to the wireless icon.
3. Turn off the Wi-Fi toggle switch in the top-right corner.
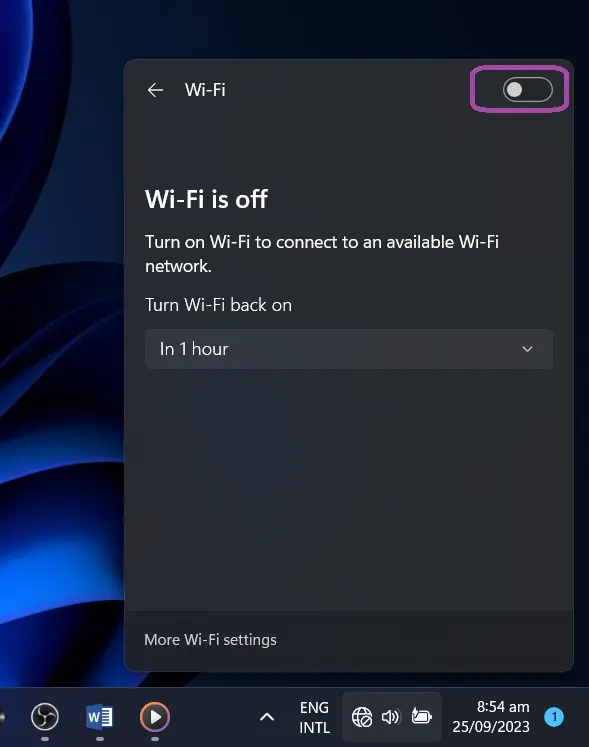
4. Use the drop-down menu and select when to reconnect automatically:
• Manually.
• In 1 hour.
• In 4 hours.
• In 1 day.
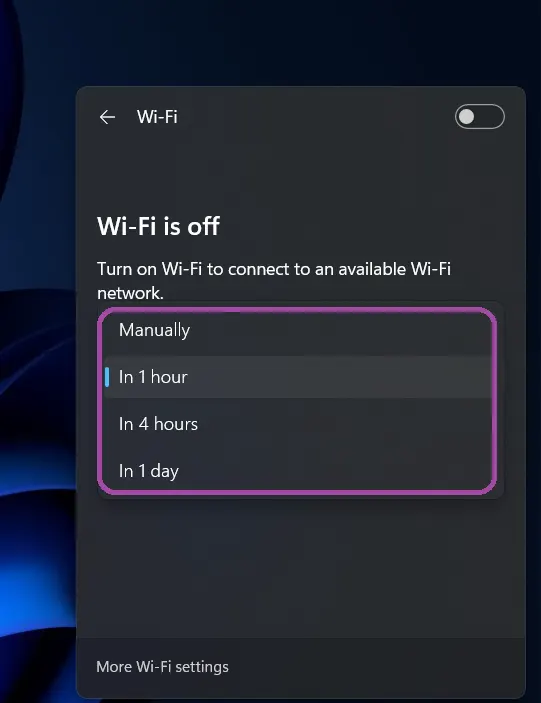
When the steps above are completed, Windows 11 won’t reconnect until the time you selected is up.
How To Connect Wi-Fi Network From Setting App
Again You can also add wireless connections manually using the Settings app. Here are steps to follower to connect wireless network through Setting Windows 11
To manually add a wireless connection, use these steps:
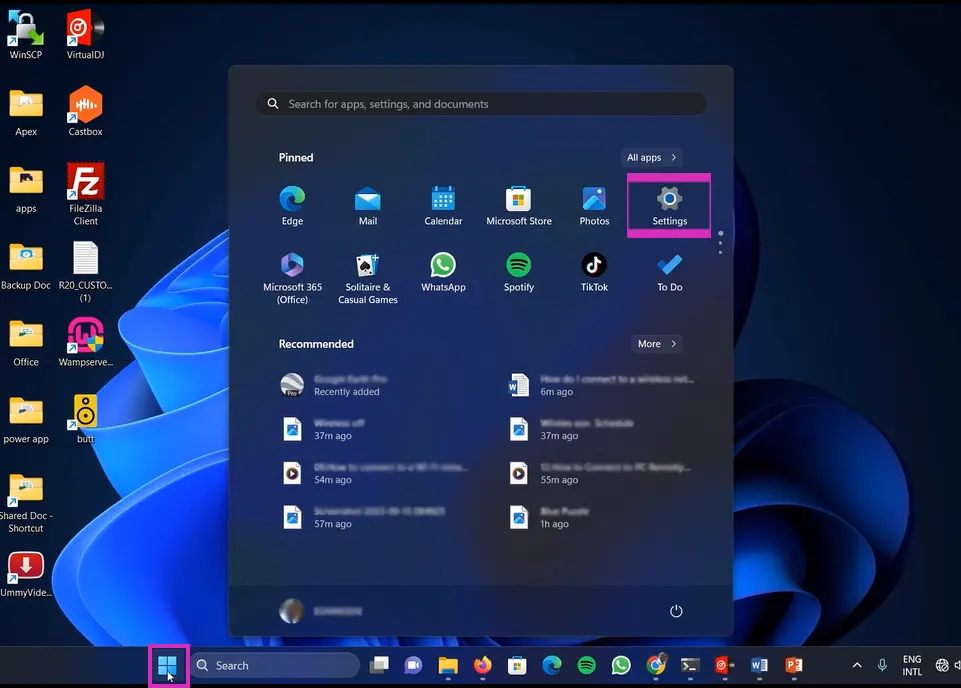
1. Click on Start Button
2. Click Settings App.
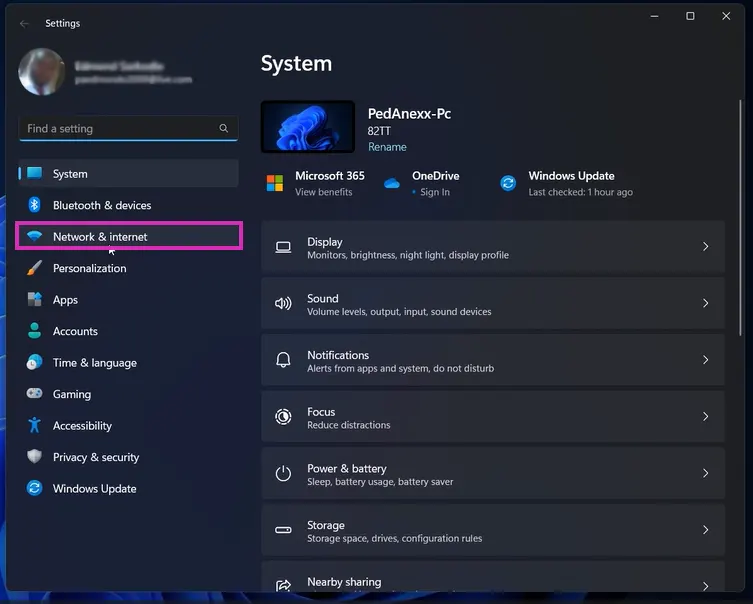
3. Click on Network & internet.
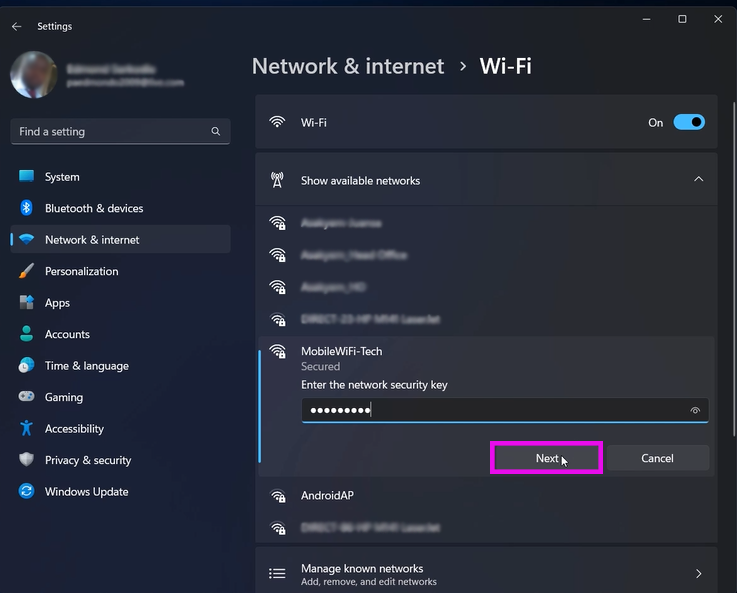
4. Click on Wi-Fi, then click on Show available network
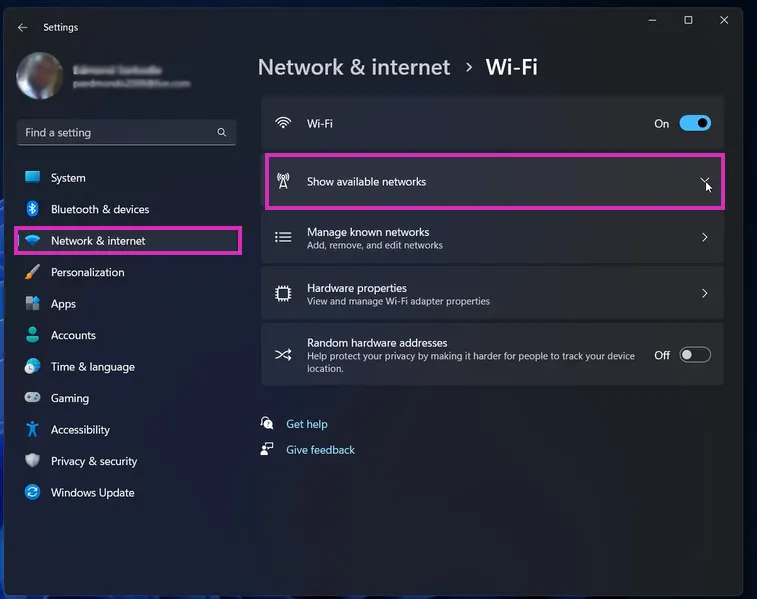
5. Choose the Wireless Network you want, input the Password and Click on Next to connect
How To Connect Wi-Fi Network From Control Panel
Here are Steps to connect to a wireless network through Control Panel on Windows 11
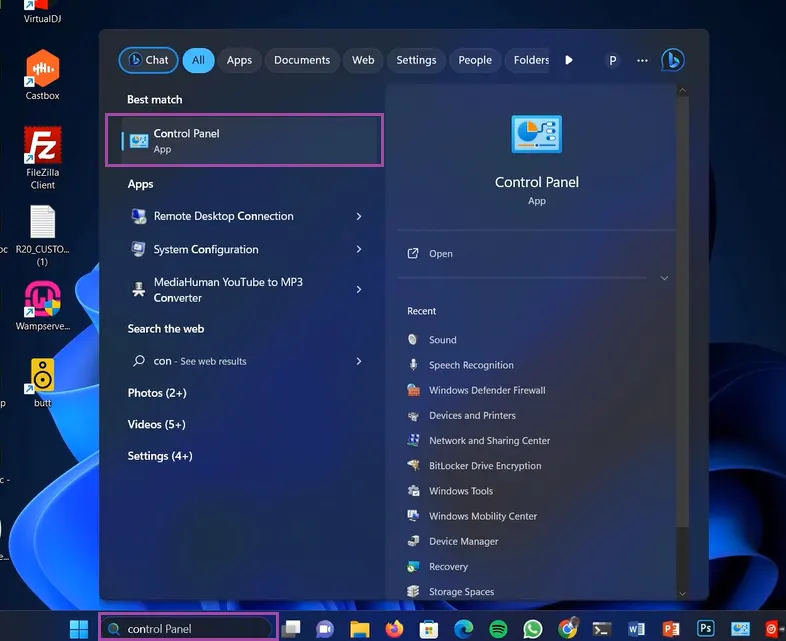
1. In the Search Field Input Control Panel.
2. Click on Control Panel App
3. Control Panel Window Pop, on the Top Right Side of the Screen ,Change View by: from Category to small icon
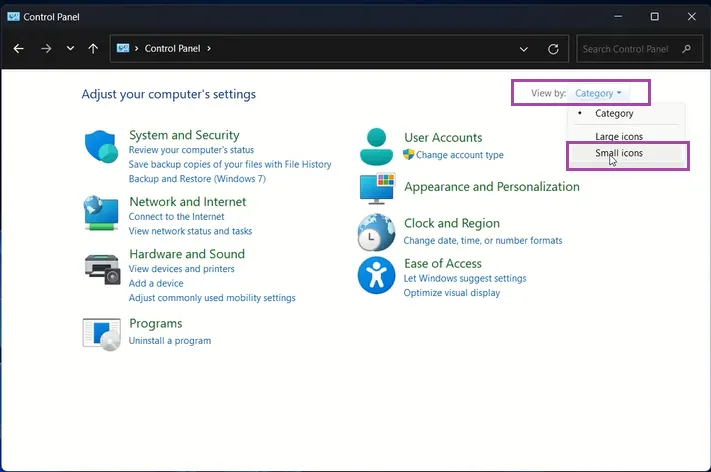
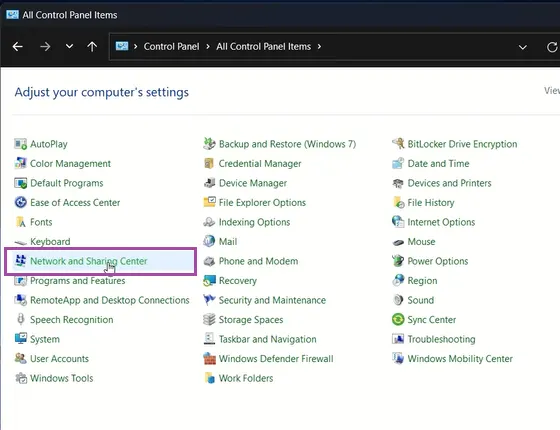
4. Click on Network and Internet.
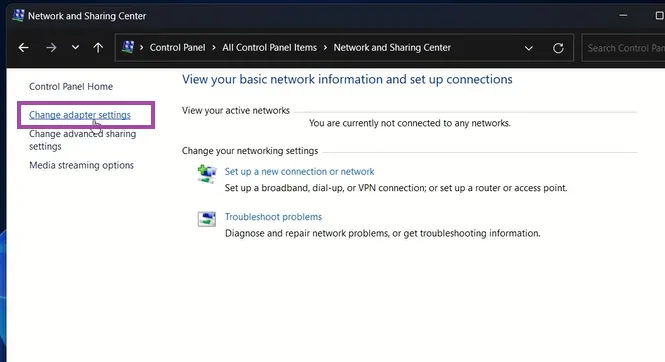
5. Click on Network and Sharing Center.
6. Click on Change adaptersetting tab
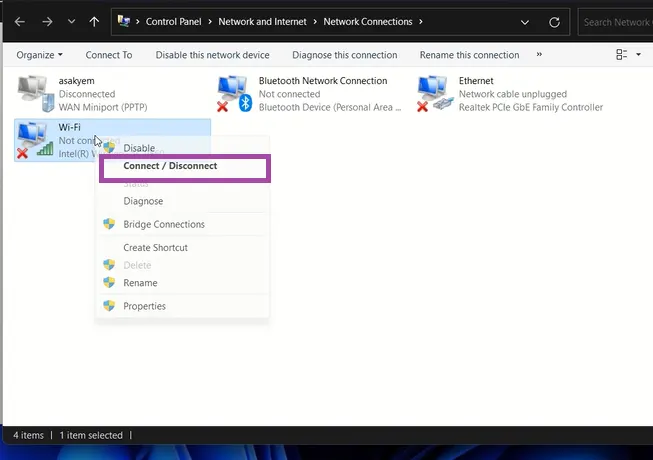
7. Locate the PC Wireless Network Adopter Connection, Right Click On It
8. Click on Connect /Disconnect tab
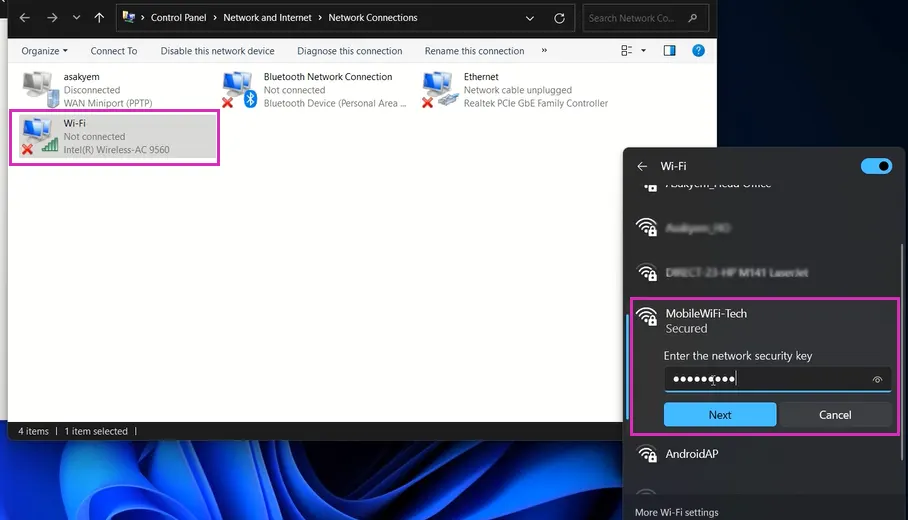
9. Choose the Available Network, Input the Password and click on Next to connect
Once procedure is followers , the computer will automatically connect to the Wi-Fi network.
Again, You can also read on How to learn Creating Folder in Window 11,How to Delete and Restore File On Windows 11,How to Turn on two-factor authentication for Facebook to protect your Facebook Account from Attack, and How to Enable Authenticator App as 2FA for Facebook if you want to change Facebook Account. I will also recommend you read the post on How to Login to Facebook with an alternative phone with two Factor enable.
Conclusion
Now, you must have an idea of How to connect a wireless network on Windows 11. Ask your questions in the comments below. Try to follow us on Facebook, Instagram , and Twitter. Also if the post has helped you Kindly subscribe to our YouTube channel to continue learning.
SarkEddy
I am an information technology professional, who always follows his passion. I love to write about tips and tricks of Windows, Virtual Pc, WordPress, OBs, Windows Security, AWS Amazon, Google Cloud, Local Hosting, and Cloud Hosting.