How to Enable Firewall on Windows 11
In Windows 11 as a Built-in Firewall by default to Check incoming and outgoing network traffic to allow or block connections based on predefined inbound and outbound rules to protect your computer from vulnerable to external attacks.
This guide, will elaborate the procedure to enable Firewall on your Desktop Pc and Laptop, if you want to learn Kindly read the post.
Let explore into the Steps through how to enable firewall on Windows 11, the post will walk you through how enable or disable the Windows Firewall manually using the following methods: How to enable Firewall Using Taskbar and How to Firewall Using Control Panel,
How to enable Firewall Using Taskbar?
Here are the steps to follower enable the firewall on the taskbar
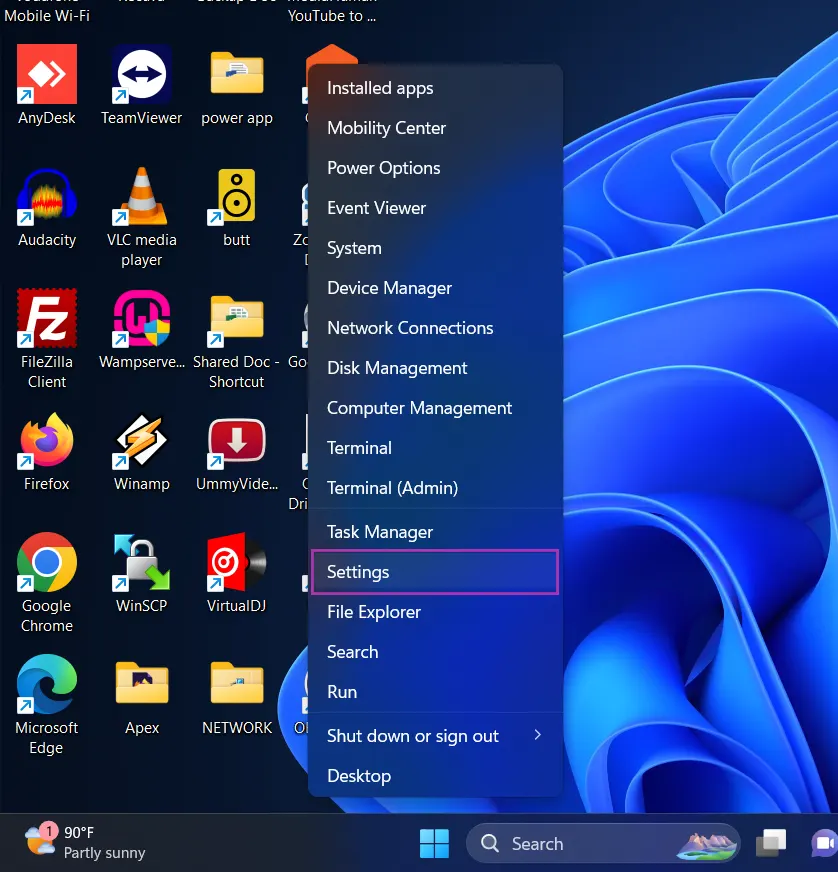
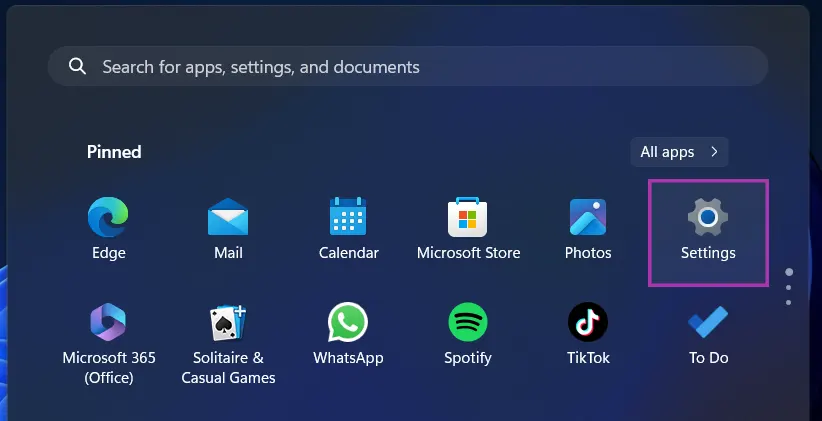
1. On the Taskbar Right-click the Windows icon
2. Click Settings Tab.
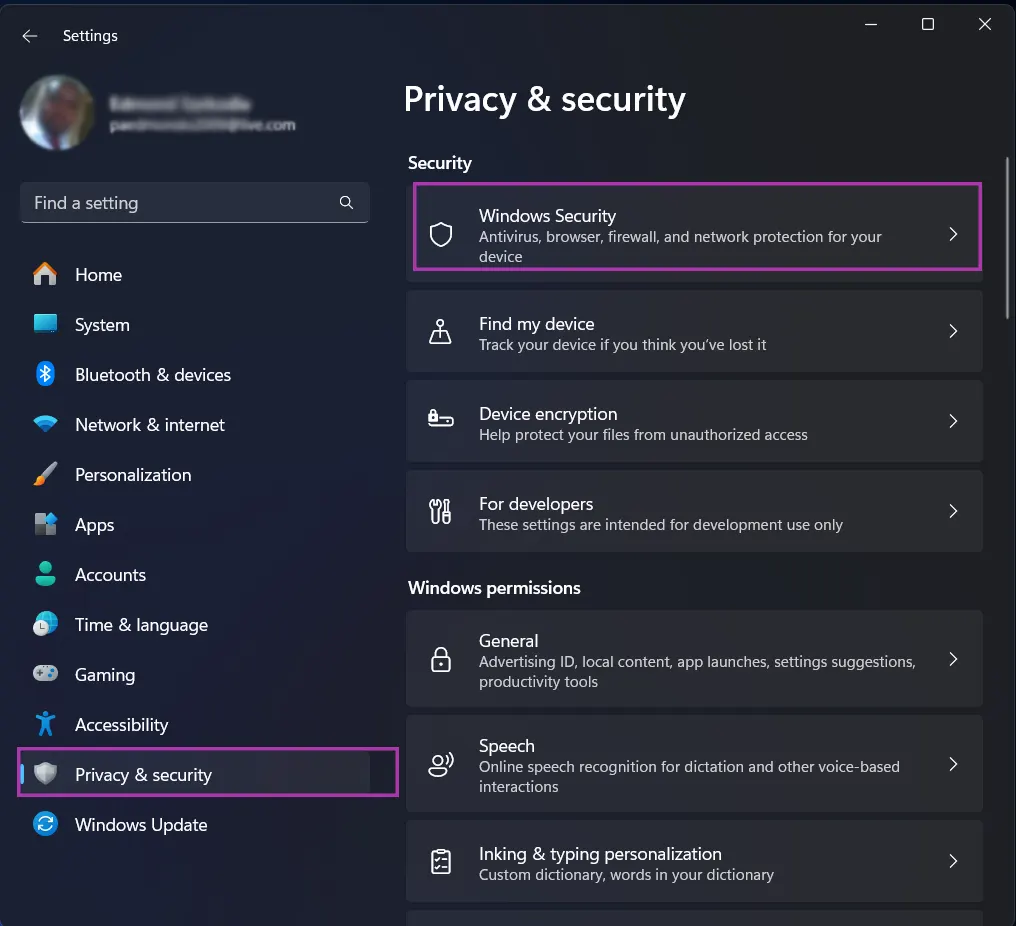
3. Click on Privacy & Security on the lift panel
4. Click Windows Security.
5. Click on Firewall & network protection.
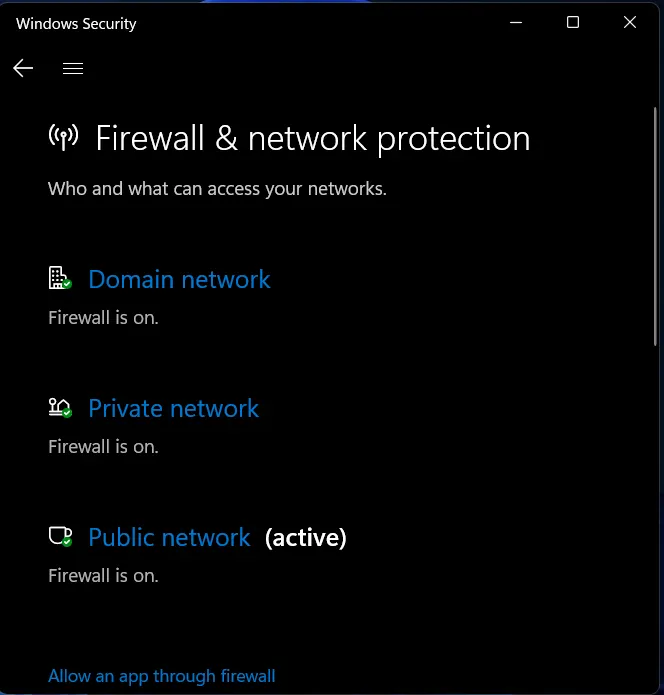
6. Then Turn On the firewall been Domain Network, Private Network and Public Network examine your firewall settings.
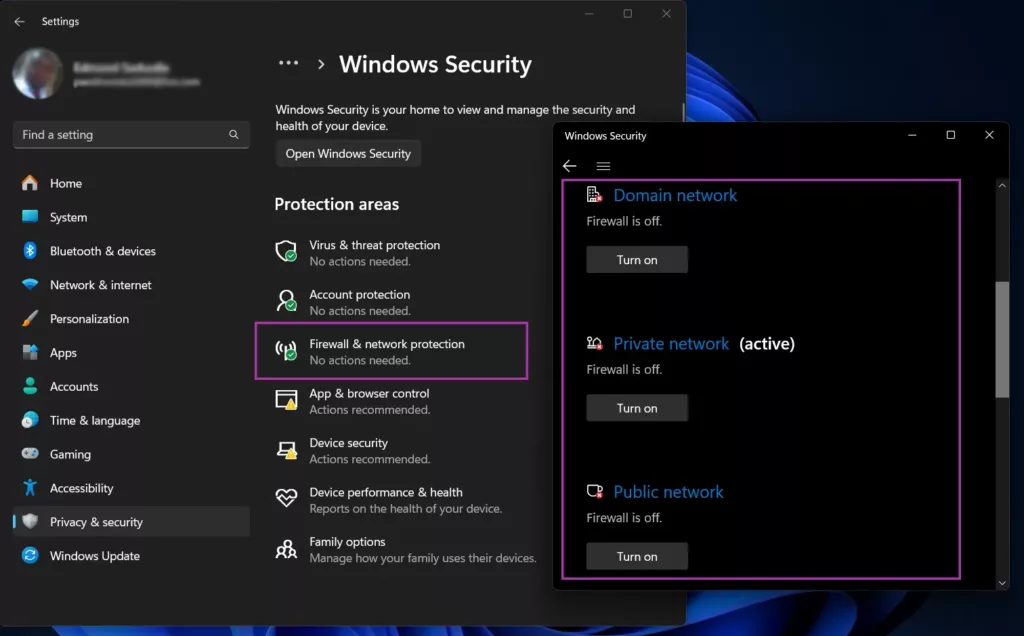
7. If the firewall is Off, you can Turn On
How to Firewall Using Control Panel
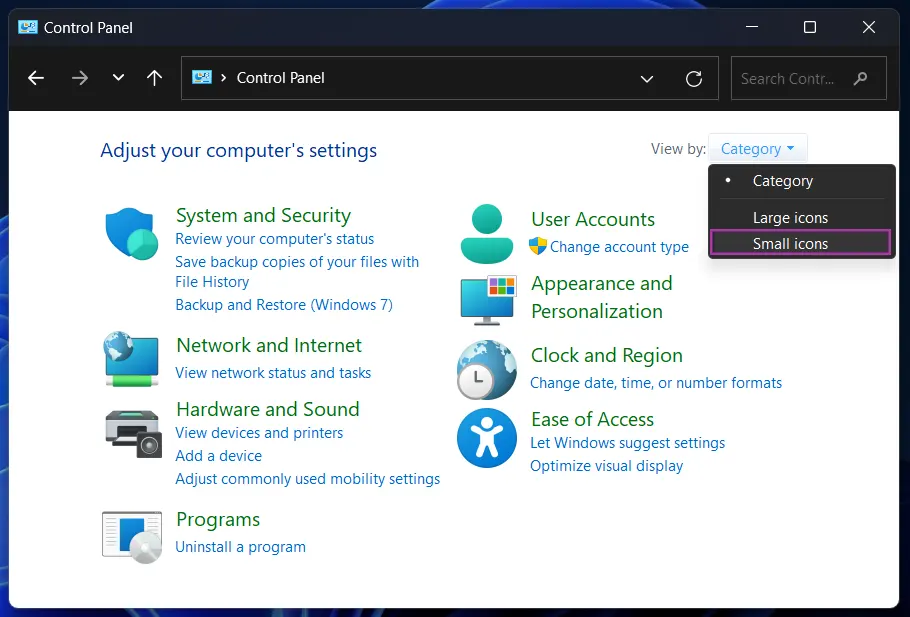
1. On the taskbar in search Field, inputter in Control Panel
2. Click on Control Panel
3. A Control Panel Windows Pop
4. On the right top Change, the View by: Change from Category to Small Icon
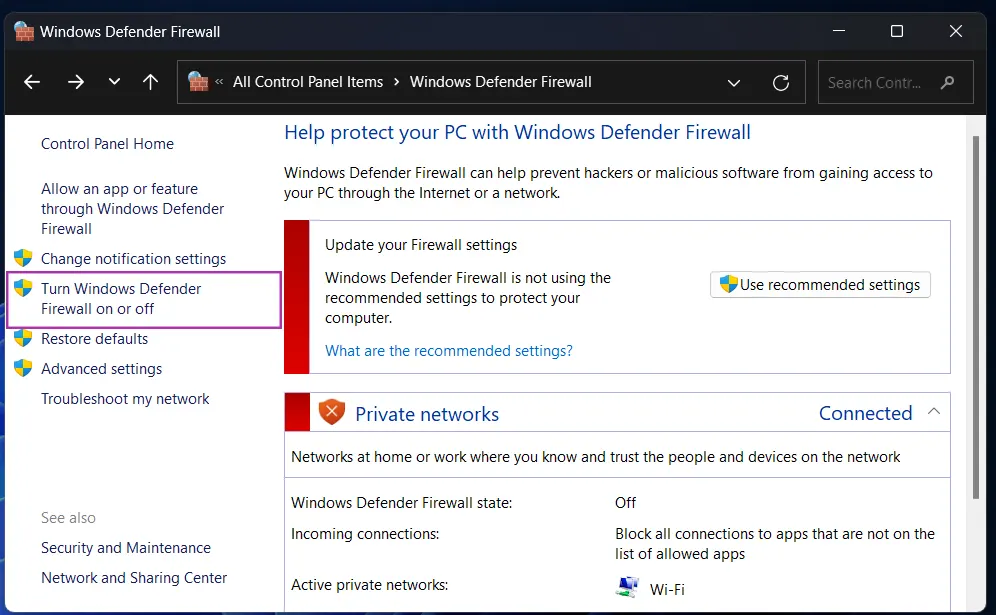
5. Click on Windows Defender Firewall
6. Click on Turn Windows Defender Firewall on or off
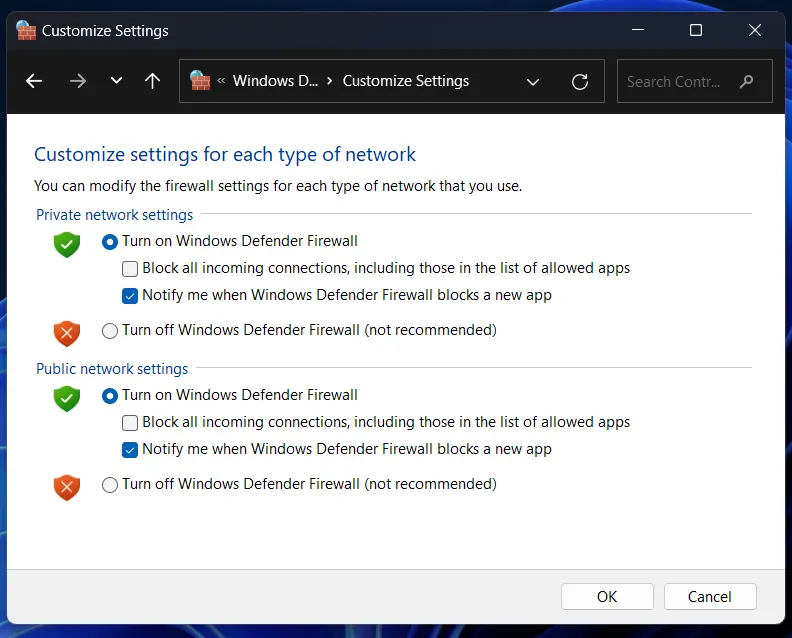
7. On Customize Settings Window, Tick on Turn On Windows Defender Firewall been Private network Settings or Public network Settings
8. Click on OK and Enable Firewall
Also, Using Windows 11 (OS) you can also turn off Firewall by Following the procedure Using the laydown process in How to disable or Turn off Firewall on Windows 11. Try to follow us on Facebook, Instagram, and Twitter . If the post has helped you Kindly subscribe to our YouTube channel
Conclusion
Now, you must have an idea of How to Enable Firewall on Windows 11. If you have any questions Ask in the comments below.

